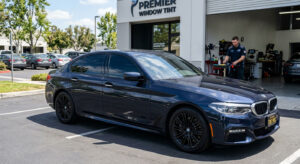
Three years ago, a client brought an acoustic nightmare into my installation bay of car audio: a heavily modified late-model sports coupe. The engine noise was a mechanical symphony to gearheads but an absolute wrecking ball to dynamic range. He demanded concert-hall fidelity without compromising curb weight. We could not rely on the amateur strategy of simply throwing massive subwoofers at the problem. True acoustic clarity demands a surgical approach to the physical environment. Speakers do not operate in a vacuum. They interact fiercely with the physical space around them. I realized early in my career that mastering mobile acoustics requires dismantling the factory limitations entirely.
Executive Summary: Core Elements of Acoustic Mastery
Engineering a high-fidelity soundscape inside a vehicle requires balancing physics, electrical engineering, and acoustic science. The table below outlines the critical phases I execute during high-end custom builds.
| Phase | Objective | Key Technologies & Methods |
|---|---|---|
| Acoustic Isolation | Lower the ambient noise floor and eliminate structural resonance from the vehicle body. | Constrained Layer Damping (CLD), Closed Cell Foam (CCF), Mass Loaded Vinyl (MLV) |
| Electrical Upgrades | Ensure stable voltage delivery for high-current amplifier draws during transient peaks. | OFC Copper Wiring, High-Output Alternators, AGM or Lithium-Ion Battery Banks |
| Signal Processing | Correct cabin anomalies, align acoustic centers, and mitigate frequency cancellations. | Digital Signal Processors (DSPs), Time Alignment, Parametric Equalization (PEQ) |
| Transducer Integration | Reproduce the audio signal with zero distortion and optimal off-axis dispersion. | Class D Topology, Active Crossovers, Rigid Baffle Fabrication |
The Hostile Acoustic Environment of Mobile Car Audio
Vehicles are objectively the worst spaces to evaluate sound. Glass reflects high frequencies with vicious efficiency, creating harsh reflections that smear stereo imaging. Upholstered seats and carpeted floors absorb midrange tones unpredictably. Curved dashboards act as acoustic horns, artificially amplifying specific bandwidths. The result? Severe comb filtering and phase cancellation. When you sit in the driver’s seat, you are positioned heavily to one side. The left midbass driver is perhaps two feet from your ear, while the passenger side driver is nearly five feet away. This physical asymmetry completely destroys the center phantom image.
Overcoming Path Length Differences
Audio waves travel at roughly 1,130 feet per second. When the signal from the left speaker arrives at your eardrum milliseconds before the right speaker, your brain registers the audio as originating strictly from the closest door. We call this the Path Length Difference (PLD). Historically, installers attempted to mitigate PLD by utilizing kick-panel pods. By moving the transducers down into the footwells, the relative distance between the left and right speakers becomes mathematically closer to a 1:1 ratio. While physically effective, this method requires heavily modifying the interior footprint. Modern technicians attack this via software, but understanding the acoustic geometry is step one. Correcting the physical dispersion patterns ensures the software does not have to heavily aggressively EQ a poorly aimed driver.
Strategic Sound Deadening for Car Audio Systems
Most enthusiasts entirely misunderstand acoustic treatment. They purchase bulk packs of foil-backed butyl and plaster every square inch of their trunk. This is an egregious waste of capital and adds unnecessary mass to the vehicle. Effective treatment requires treating specific structural weaknesses. Automotive sheet metal acts as a giant passive radiator. When a rigid 6.5-inch driver pushes midbass frequencies, the thin door skin resonates out of phase, introducing destructive interference that physically cancels out the bass response. You hear rattles, but you are also actively losing output.
The Three-Stage Isolation Method
Constrained Layer Damping (CLD) is the first line of defense. CLD tiles work by converting kinetic energy—the vibration of the metal—into microscopic amounts of low-grade heat. You only need approximately 25% to 30% coverage strategically placed on large, flat sheet metal panels to successfully lower their resonant frequency of car audio out of the audible band. Knocking on the outside of a properly treated door should yield a dead, solid thud rather than a hollow ringing.
Once the sheet metal is stabilized, the second layer comes into play. Closed Cell Foam (CCF) acts strictly as a decoupling layer. Despite marketing claims, thin foam possesses virtually no acoustic blocking properties against low-frequency tire roar. Its sole architectural purpose is to float the third and most critical layer: Mass Loaded Vinyl (MLV). MLV is incredibly dense, typically weighing one pound per square foot. This is your true acoustic barrier. It physically intercepts airborne sound waves from exhaust drones and road friction. Lowering the ambient noise floor of a vehicle by just 3 decibels is the mathematical equivalent of doubling your amplifier’s output power. When you lower the noise floor, dynamic micro-details in high-resolution audio suddenly emerge from the background. Proper acoustic isolation also aids in maintaining vehicle resale value by ensuring interior plastics do not fatigue and crack from intense mechanical vibrations.
Upgrading Vehicle Electrical Grids
I frequently measure the electrical draw before implementing any serious amplification. A stock 90-amp alternator struggles to power the vehicle’s essential control modules while simultaneously feeding a 1500-watt RMS Class D monoblock. Voltage drop is the silent killer of transient dynamics. When the amplifier lacks instantaneous current, the power supply sags. The internal rail voltage drops. The output clips, transforming smooth sine waves into jagged square waves. Tweeters fry. Subwoofer coils burn.
Powering High-Fidelity Car Audio Setups
Before installing secondary battery banks, the fundamental wiring must be flawless. I strictly utilize Oxygen-Free Copper (OFC) wiring. Copper-Clad Aluminum (CCA) wiring is cheaper, but aluminum has significantly higher electrical resistance. Running 20 feet of 4-gauge CCA to a trunk-mounted amplifier results in catastrophic voltage drop under heavy load. Furthermore, the factory ground straps in most vehicles are woefully inadequate. The “Big Three” upgrade is mandatory for high-output systems. This involves upgrading three primary charging cables with 1/0 AWG OFC wire: the alternator positive to battery positive, the battery negative to the chassis, and the engine block to the chassis. By minimizing resistance in the charging loop, the alternator can efficiently replenish the battery bank during intense bass transients.
For energy storage, Absorbent Glass Mat (AGM) batteries were the gold standard for decades. However, Lithium Iron Phosphate (LiFePO4) technology now dominates professional builds. Lithium batteries rest at a higher nominal voltage (typically 13.3V compared to AGM’s 12.8V) and can discharge massive amounts of current instantly without severe voltage sag. Their energy density allows for tremendous weight savings, a crucial factor when installing systems in sports cars or lightweight vehicles.
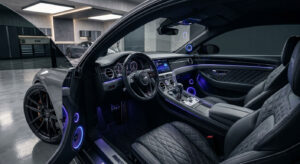
Transducer Placement in Auto Acoustics
The speaker itself is only half the equation; the installation dictates the final performance. Factory speaker locations are chosen by automotive accountants, not acousticians. Coaxial speakers—where the tweeter is mounted on a pole piece dead center of the woofer—are highly convenient but severely flawed. The woofer cone acts as a physical horn for the tweeter, causing early reflections. For absolute clarity, component speaker systems are non-negotiable.
Managing Off-Axis Response
When selecting a tweeter mounting location, you must calculate the off-axis response. A 1-inch silk dome tweeter sounds exceptionally smooth when pointed directly at your ear (on-axis). However, position it 45 degrees off-axis in a factory door location, and the frequencies above 10 kHz roll off drastically. I prefer fabricating custom fiberglass A-pillar pods. By aiming the tweeters and midrange drivers across the dashboard, we utilize the windshield to reinforce the soundstage depth. The goal is to make the physical speakers disappear acoustically. If you close your eyes and can point to exactly where the sound is coming from, the staging has failed. The vocals should project from an imaginary stage hovering directly over the center of the hood.
Midbass drivers in the doors require extreme rigidity. Mounting a high-end speaker directly to flimsy door plastic guarantees a muddy response. I route custom speaker baffles out of High-Density Polyethylene (HDPE) or expanded PVC. Unlike MDF (Medium Density Fiberboard), plastics will never swell or rot when exposed to the inevitable moisture inside a car door. Securing these baffles with threaded inserts and machine screws ensures the driver transfers all of its mechanical energy into moving air, rather than flexing the mounting bracket.
Digital Signal Processing: The Heart of Modern Vehicle Car Sound
If there is one absolute necessity in contemporary mobile acoustics, it is the standalone Digital Signal Processor. A premium DSP is the master brain of the entire network. Without it, you are simply crossing your fingers and hoping the speakers play nicely together. I spend hours sitting in the driver’s seat with a calibrated measurement microphone routed into an acoustic analysis software suite. The human ear is an astonishingly adaptive organ, but it is a terrible absolute measurement tool. We suffer from extreme confirmation bias. The microphone, however, possesses no ego. It blatantly displays the harsh reality of modal ringing at 150 Hz and severe phase cancellation dips at 400 Hz of our car audio.
Tuning Your Car Audio Soundstage
The first phase of DSP tuning is time alignment. Remember the Path Length Difference? The DSP fixes this via microsecond delays. I measure the exact physical distance from each speaker’s acoustic center to the tip of my nose in the driving position. The DSP calculates the delay needed for the closest speakers, holding back their signal so that the acoustic waves from the furthest speakers arrive at my eardrums at the exact same millisecond. When time alignment is dialed in perfectly, the soundstage snaps into absolute focus. The bass transitions from the rear of the vehicle to firmly anchoring itself to the front windshield.
Next comes crossover configuration. I generally utilize 24 dB per octave Linkwitz-Riley slopes. This provides steep, phase-coherent attenuation. It prevents a delicate midrange from attempting to reproduce damaging sub-bass frequencies, while seamlessly blending the transition points between drivers. The final phase is Parametric Equalization (PEQ). Rather than simple bass and treble knobs, a DSP offers 30 bands of equalization per channel. We pull down the harsh resonant peaks caused by the glass reflections and gently boost the dips. I always tune to a specific target curve—often derived from standards established by audio engineering professionals—which typically features an elevated sub-bass region that gently slopes downward toward the high frequencies. This mimics the natural acoustic profile of a treated listening room.
The Amplifier Paradigm: Powering Your Mobile Acoustic Setup
Amplifier technology has undergone a massive evolution. Historically, Class A/B amplifiers were demanded for critical listening. They sound exceptionally warm and produce zero switching distortion. However, they are incredibly inefficient. A typical Class A/B amplifier turns nearly 50% of its consumed electrical energy straight into thermal waste. In the confined, poorly ventilated spaces of a vehicle, this heat buildup is catastrophic.
Enter modern Class D topology. Early Class D amps were relegated strictly to subwoofer duty because their low switching frequencies introduced audible high-frequency distortion. Today, utilizing advanced pulse-width modulation and ultra-fast switching MOSFETs, full-range Class D amplifiers deliver pristine fidelity with an astonishing 85% efficiency rate. They pull significantly less current from the alternator and can be engineered into chassis sizes no larger than a hardcover novel. This allows for stealth installations under seats or hidden within quarter panels, maintaining the vehicle’s factory aesthetics. I heavily prioritize Signal-to-Noise Ratio (SNR) and Total Harmonic Distortion (THD) metrics when selecting an amplifier. An SNR above 100dB ensures that during silent passages in a track, you hear absolute blackness, not a faint electrical hiss.
Low-Frequency Reproduction: Mastering the Subwoofer of Car Audio
Sub-bass reproduction is governed fiercely by Hoffman’s Iron Law. This acoustic principle dictates a cruel triangle of compromises in subwoofer design. You can have high electrical efficiency, deep low-frequency extension, or a small physical enclosure volume. You are allowed to pick exactly two. The laws of physics flatly refuse to negotiate on the third. If a client demands earth-shattering lows from an enclosure the size of a shoebox, they must compensate with thousands of watts of power and an incredibly robust subwoofer motor structure.
Cabin Gain and Bass Frequencies
The vehicle interior provides a unique phenomenon known as the Transfer Function, or Cabin Gain. In a typical sedan, the longest dimension of the cabin is shorter than the wavelength of deep bass notes. Below roughly 60 Hz, the entire cabin begins to act as a pressure vessel rather than an acoustic room. This naturally boosts the low frequencies by approximately 12 dB per octave as the frequency drops. Consequently, a sealed enclosure that naturally rolls off at 12 dB per octave perfectly complements this cabin gain, resulting in a remarkably flat and musical sub-bass response down to 20 Hz.
Ported enclosures are significantly more efficient and provide more output around their tuning frequency. However, they require massive volume and introduce group delay, which can make the bass sound “slow” or disconnected from the front midbass drivers. For audiophile applications, I rely on Infinite Baffle (IB) setups when the vehicle architecture permits. By sealing the trunk perfectly from the cabin and using the entire trunk as the enclosure, we achieve astonishing low-frequency extension with incredible transient response, zero enclosure resonance, and virtually zero added weight.
High-Resolution Car Audio Integration in Vehicles
The highest quality amplifiers and transducers are completely useless if the source signal is compromised. Relying on a standard Bluetooth SBC codec compresses the dynamic range, stripping away the micro-details of hi-hats and acoustic guitars. Whenever possible, I utilize direct digital integration. Optical outputs (TOSLINK) routed straight from a Digital Audio Player (DAP) directly into the DSP bypass the vehicle’s inferior factory digital-to-analog converters (DACs). If wireless convenience is required, integrating advanced codecs like LDAC or aptX HD allows for near-lossless transmission. Integrating these modules seamlessly requires deep knowledge of custom electronics integration, ensuring the vehicle’s factory chimes, navigation voice prompts, and steering wheel controls remain fully functional.
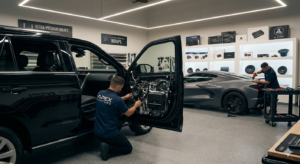
Advanced Installation Methodologies
Flawless wiring routing separates the amateurs from the veterans. Power wires and low-voltage signal cables must never run parallel to each other. Doing so invites electromagnetic interference (EMI) into the signal chain, manifesting as a high-pitched whine that increases with engine RPM. I route heavy gauge power runs down the opposite side of the vehicle from the RCA interconnects or optical cables. Every wire is wrapped in Tesa tape or Techflex braided sleeving to prevent abrasion against sharp metal edges. Connections are never merely crimped; I utilize hydraulic crimpers with pure copper lugs, followed by dual-wall adhesive-lined heat shrink to permanently lock out moisture and prevent oxidation.
Partnering with Elite Car Audio Installers
Attempting these multi-tiered installations without deep diagnostic experience often leads to destroyed interior trim panels, ground loops, or worse—electrical fires. Modern vehicles utilize CAN-bus networks that can throw dozens of error codes if a factory radio module is disconnected improperly. When tackling intricate panel removal and ensuring flawless aesthetic integration, collaborating with automotive sound and tinting specialists ensures that both form and function remain uncompromised. The ultimate goal is an installation that looks completely untouched by human hands until the volume dial is turned.
The pursuit of acoustic perfection inside a steel cage moving at 70 miles per hour is a profound engineering challenge. It demands an uncompromising respect for physics, an intimate understanding of electrical architecture, and an unyielding commitment to acoustic measurement. By methodically deadening the cabin, securing stable high-current voltage, strategically aiming premium transducers, and painstakingly calibrating the acoustic response via digital processing, we force the hostile automotive environment to yield. The resulting soundstage is immersive, dynamic, and breathtakingly precise.